

How To Clean A Glock 22 40 Cal

Glock 17 or Glock nineteen Cleaning Instructions. Glock Field Strip (disassembly), Lubrication and Reassembly
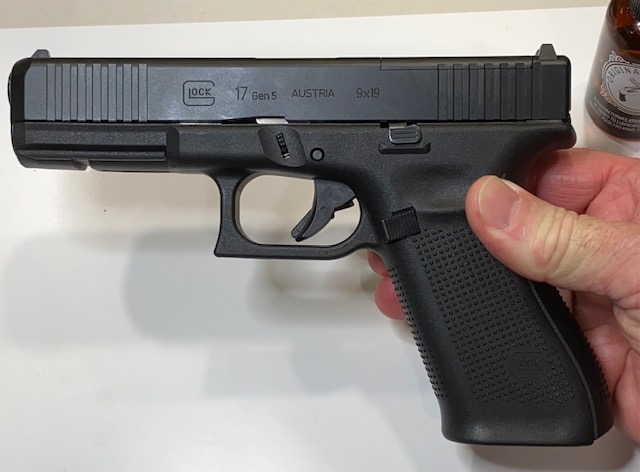
I am going to show you stride-by-step how to disassemble and clean a Glock 17, Glock 19 9mm pistol. In fact, all Glock pistols come apart the same fashion, so these instructions will work on any Glock!
From the field stripping to complete reassembly, these Glock cleaning instructions will show you how to quickly and confidently perform this task in fifteen-20 minutes.
If you have never tried to take down (field strip) your Glock 17 or Glock 19, you will soon come across how like shooting fish in a barrel it is to accomplish without even using whatsoever tools. The blueprint is excellent so anyone can hands maintain their firearm.
Related Glock Articles:
How to Install a Glock Backstrap
Field Stripping the Glock 17 or Glock xix.
This is pretty directly forrard as all Glock guns are very well-designed to come autonomously and make clean easily. After doing this once, you volition be able to do it even quicker the side by side time without instructions!
Cheque out the Audiobook, "GLOCK: The Rise of America's Gun". Get it Gratis when y'all sign upwardly for a Costless thirty-Twenty-four hour period Trial of Audible Premium Plus: https://amzn.to/3rhu6BD
All Glock pistols detach the aforementioned way
These Glock disassembly instructions will work to field strip the Glock 17, G19, G26, G34, G43, G45 and G48 (all 9mm models).
You tin can too field strip the Glock 22, G23, G24, G27 and G35 (All .40 caliber models).
As well, yous tin can field strip Glock 21, G30, G36 and G41 (.45 caliber models).
There are many different models of the Glock pistol. The differences are in the concrete size, caliber, features, etc.
Despite these differences, all Glock pistols disassemble (field strip) the aforementioned way equally shown in this article.
Different gun manufacturers take unlike ways to field strip their handguns, especially when it comes to removing the slide, and you should e'er find a tutorial earlier attempting to remove the slide from an unfamiliar gun for the first fourth dimension.
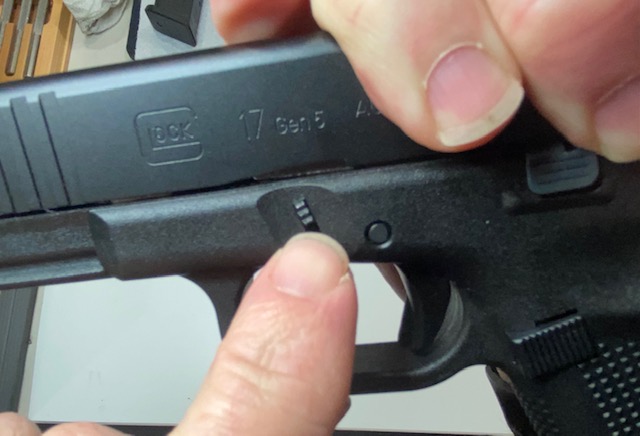
Annotation of Circumspection When Pressing the Trigger
All Glocks do require the trigger to be pressed during disassembly, which has resulted in negligent or unintentional discharges in the past. If y'all properly unload your gun and double check it before attempting to disassemble and/or clean it, you will not accept any problems.
However, pressing the trigger at any fourth dimension other than when you are on the range, sighted in, is a violation of the 2d rule of firearm prophylactic. The dominion is, "Never put your finger on the trigger until the gun is sighted in on a target and yous are prepare to shoot."
If you have never tried to have downwards (field strip) a semiautomatic gun, rest like shooting fish in a barrel as it is not hard or complicated. At to the lowest degree not the Glock 17 or Glock 19 or whatsoever other Glock model.
Glock 17 Cleaning Supplies
Here are the supplies y'all will need to consummate the disassembly and cleaning of about semi-automatic pistols. There are lots of different cleaning products, so I volition list the ones I have used for years of trouble costless results.
These are affiliate links and so kydexowbholsters.com volition receive a small commission at no cost to you lot if y'all shop through them. It is greatly appreciated!
- Original Gun Oil (Veteran Owned. Utilise Discount code SAVEWITHDAVE for x% off)
- Hoppes Boresnake or equivalent (this will save you time and effort)
- Real Gorging Bore Dominate (New Style Bore Ophidian)
- Gun Brush
- Micro fiber cloth or Cut-up cotton fiber T-shirt
- Cotton swabs or lint-free swabs
- Otis Gun Cleaning Pipe cleaners
See this article on setting up a DIY Gun Cleaning Station.
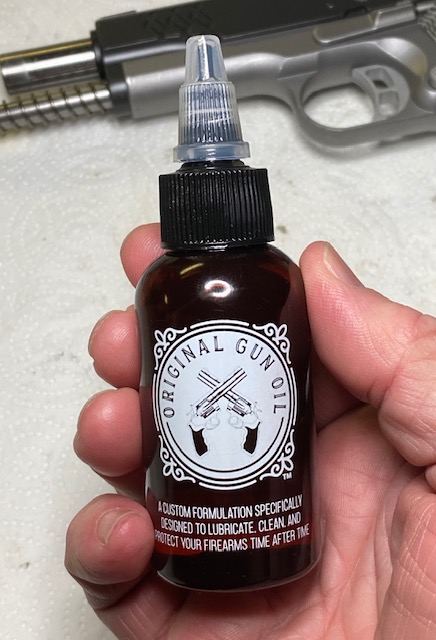
Original Gun Oil
Relieve 10% + FREE Shipping with code: SAVEWITHDAVE
Safe for Synthetic & Polymer Guns: GLOCK, M&P, XD.
I use Original Gun Oil on all my firearms. This product is a C.Fifty.P. (cleaner, lube & protectant all in one) that is Non-Toxic, Non-Staining and Not-Scented, making it safe to apply in the house! Veteran-Endemic business.
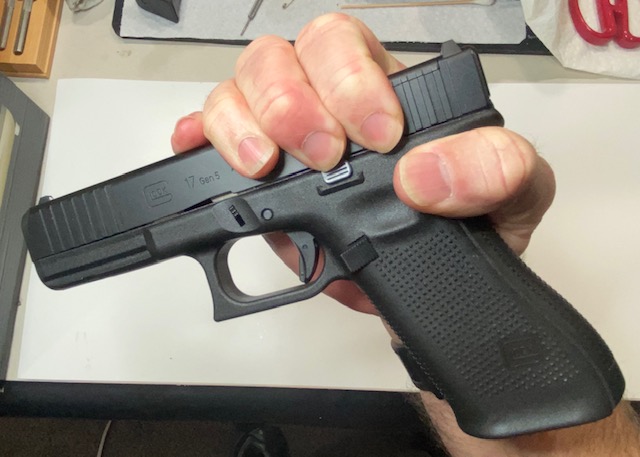
Instructions to Field Strip (disassemble) the Glock 17 9mm pistol
I am going to listing the steps, so show detailed pictures of each footstep and so you can follow along.
Pace 1. Unload the gun
This is the most of import step. Eject any magazine that is in the gun by pressing the magazine release button, and then remove the round in the chamber. Be sure to practise information technology in that social club!Mag first, and then empty the chamber!Remove whatsoever and all ammo from the surface area.

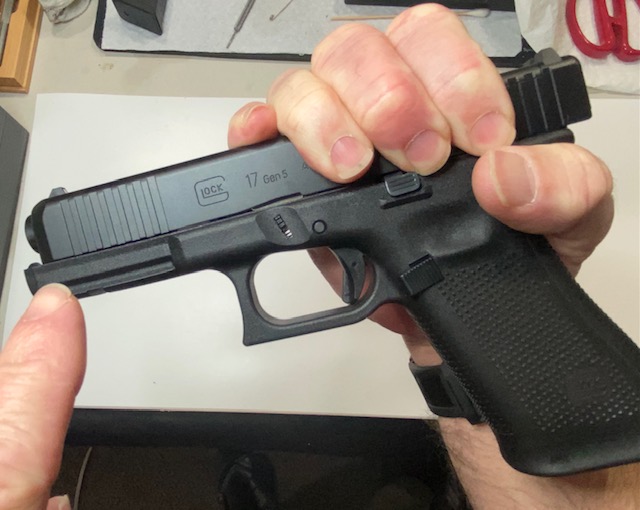
Stride 2. Verify the gun is completely unloaded
This step is disquisitional because we need to press the trigger in order to field strip a Glock pistol!!

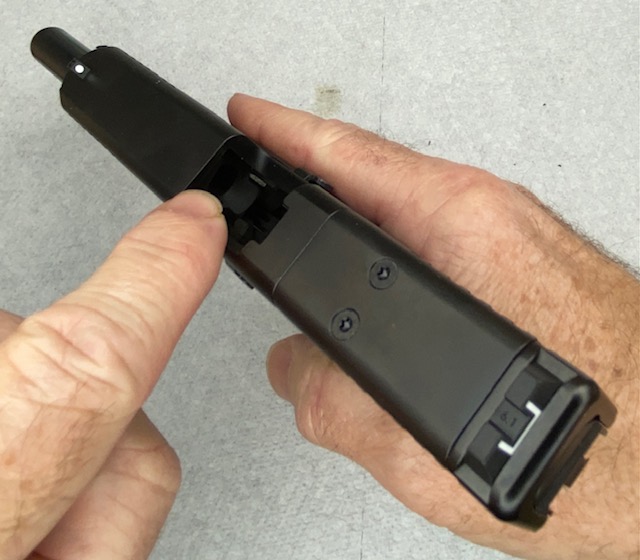
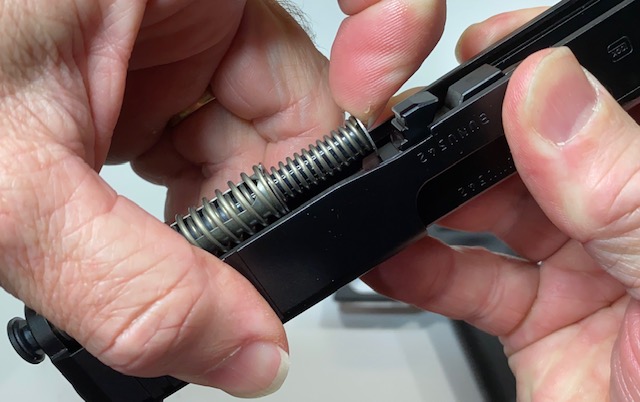
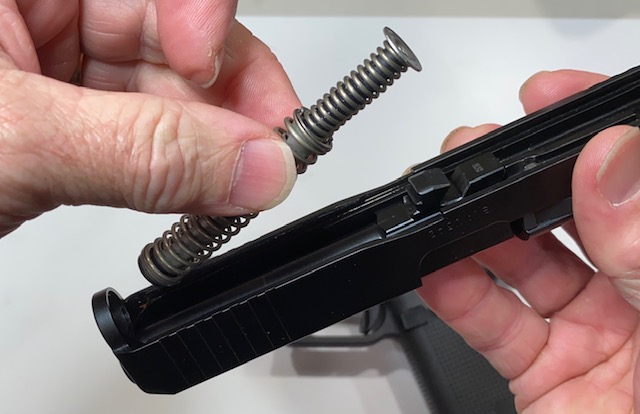
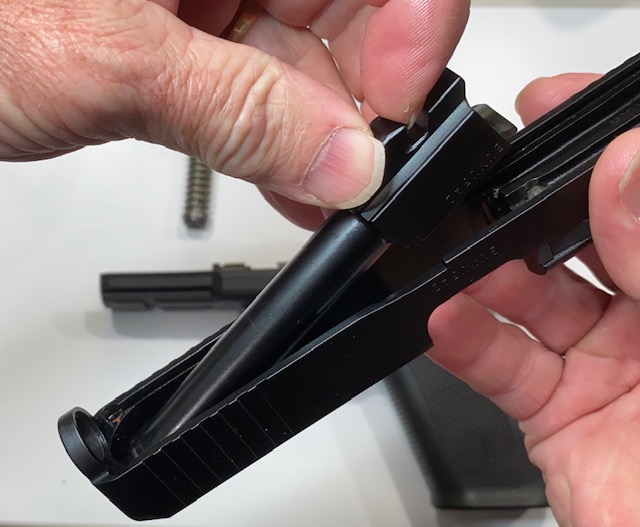
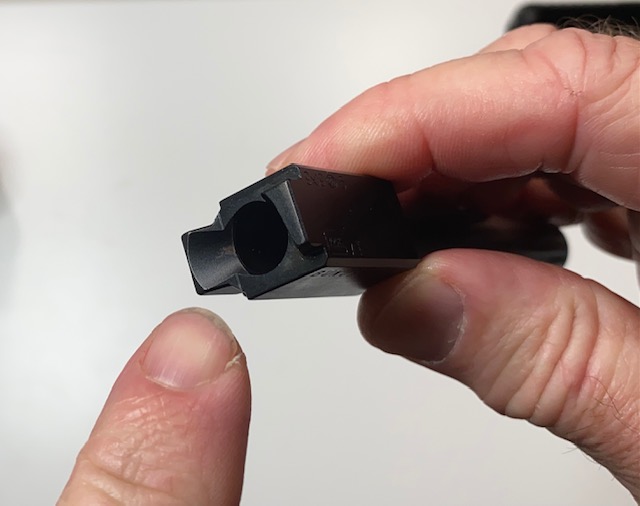
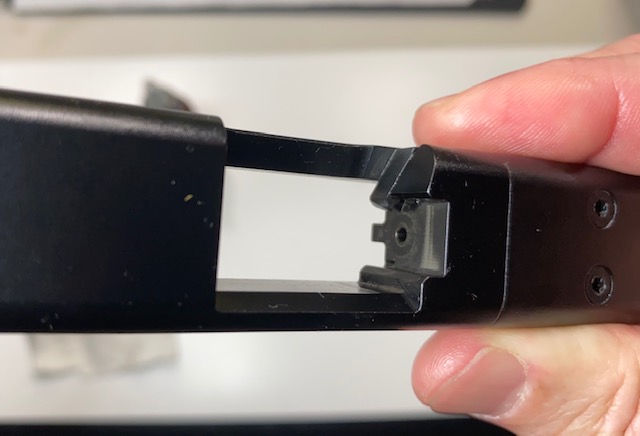
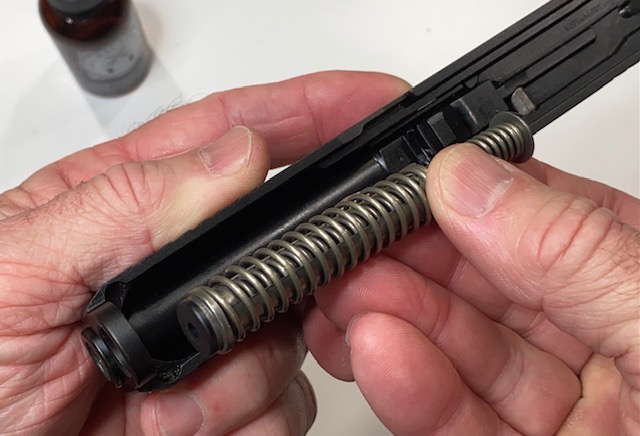
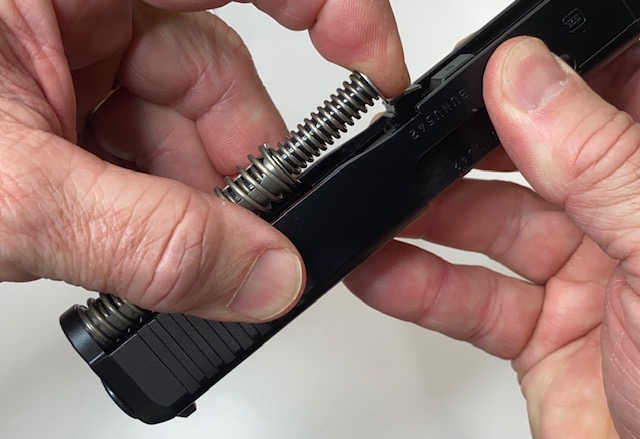
Step 3. Remove the slide, the barrel, the recoil spring/guide rod assembly

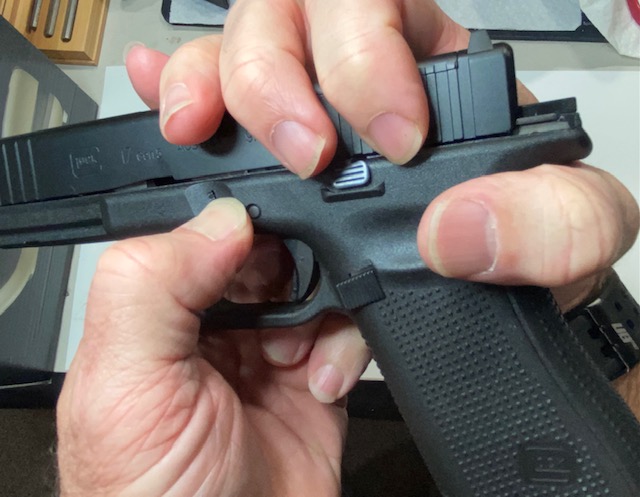
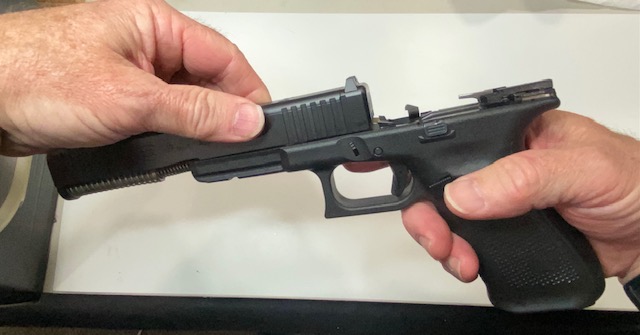

That's it for the field strip/disassembly procedure of the Glock 17 or Glock 19 9mm. This is as far as you need to go to give the gun a good cleaning, or to replace the recoil jump. Let's move on to the Glock cleaning instructions.
How to make clean a Glock 9mm
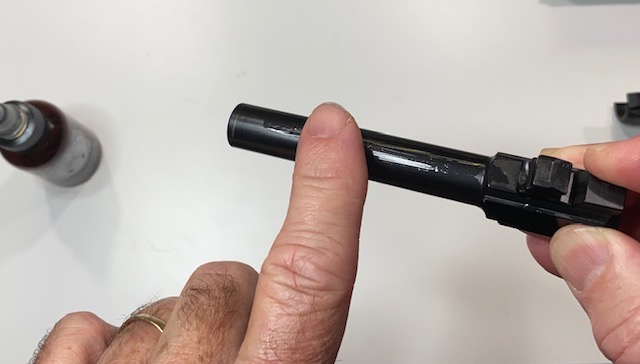
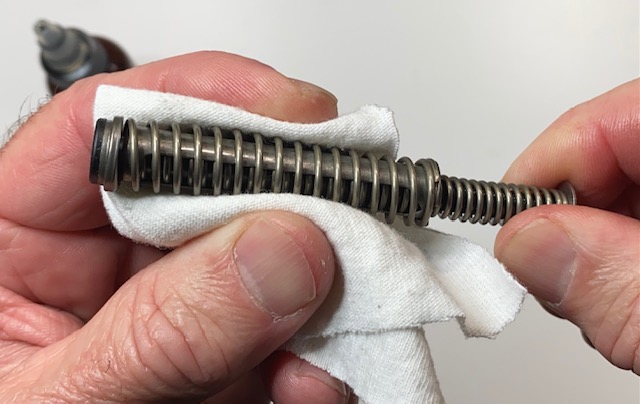
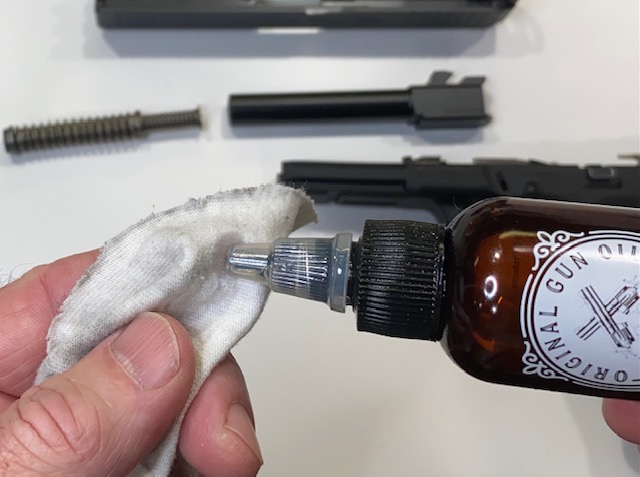
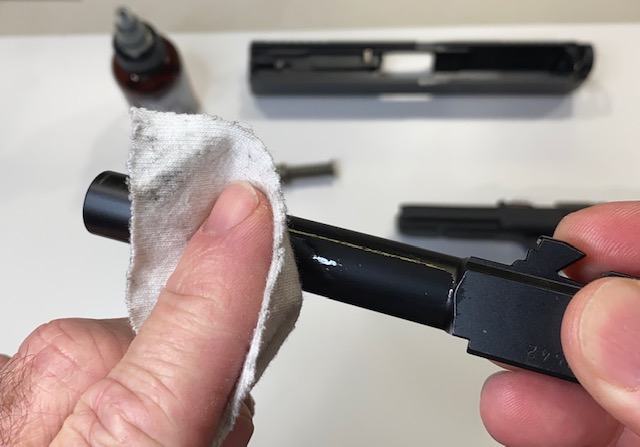
I volition start with the barrel. It does not matter which office you practice offset. Basically we are going to utilize some gun cleaner to each part and let it sit for 5 minutes or so. So we will clean it off with a cotton fabric. In this example I am using Original Gun Oil (my preferred CLP. This stuff is odor free, non-toxic and non-staining).
Here are the steps:
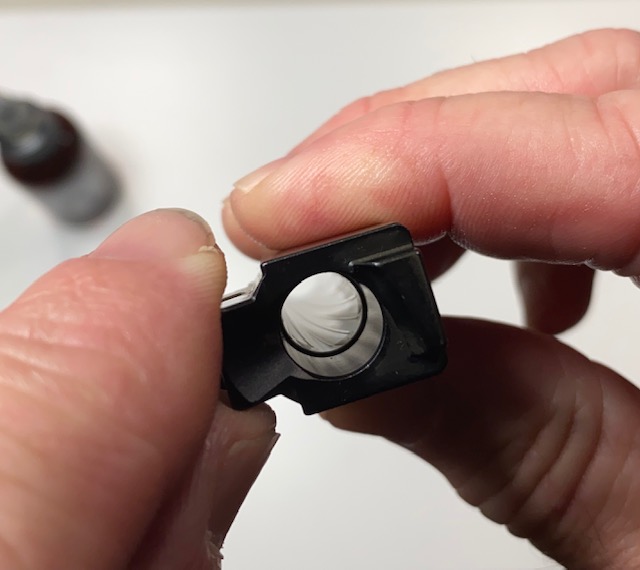
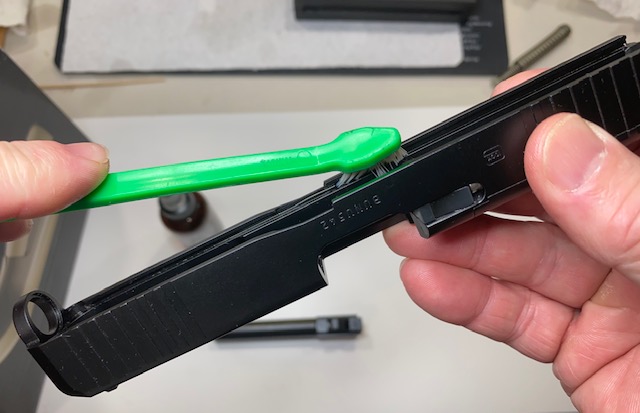
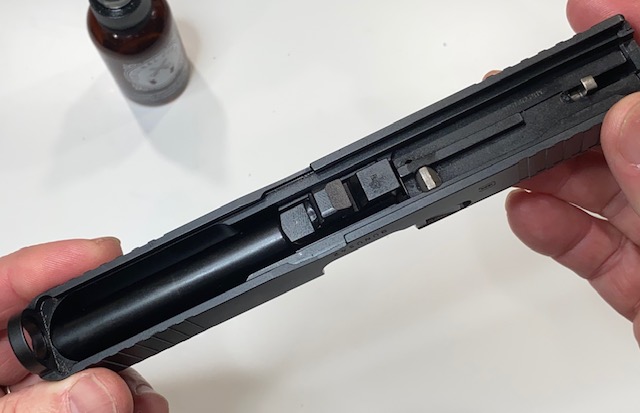
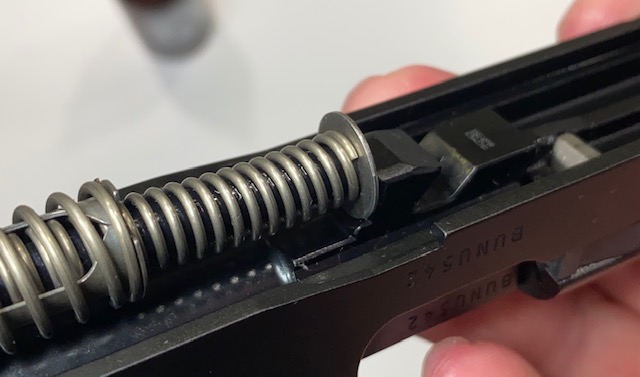
Step one. Clean the Glock barrel and recoil spring assembly
I am not using gloves because Original Gun Oil is non-toxic. If you lot are using whatsoever other solvent, please use rubber or nitrile gloves!
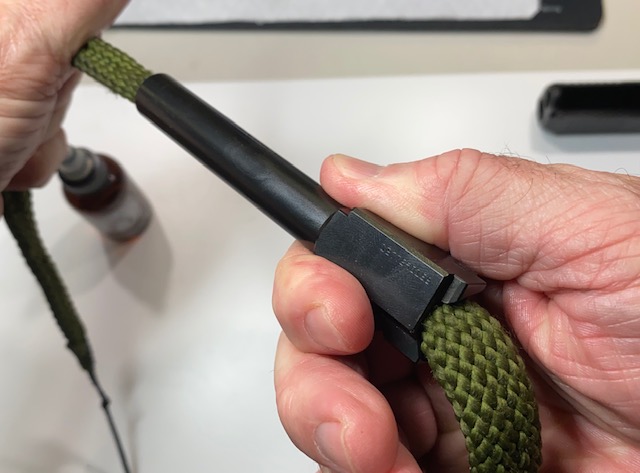
The Boresnake has copper brushes integrated into the weave so it will exercise a good job cleaning whatever pb or carbon deposits from the within of the butt.
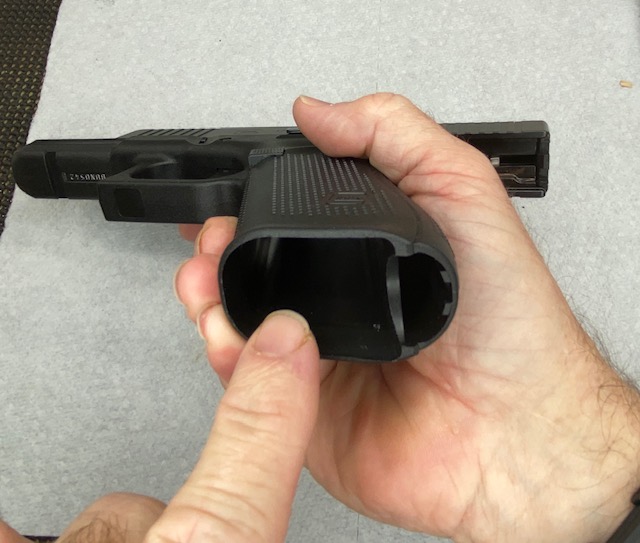
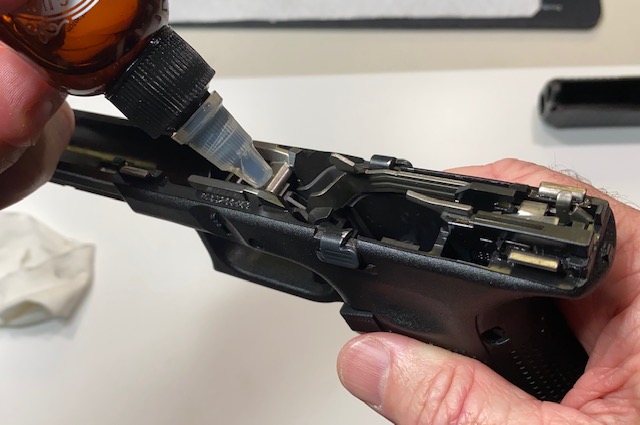
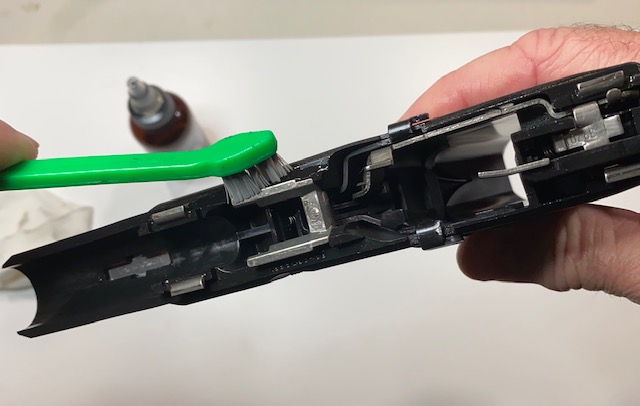
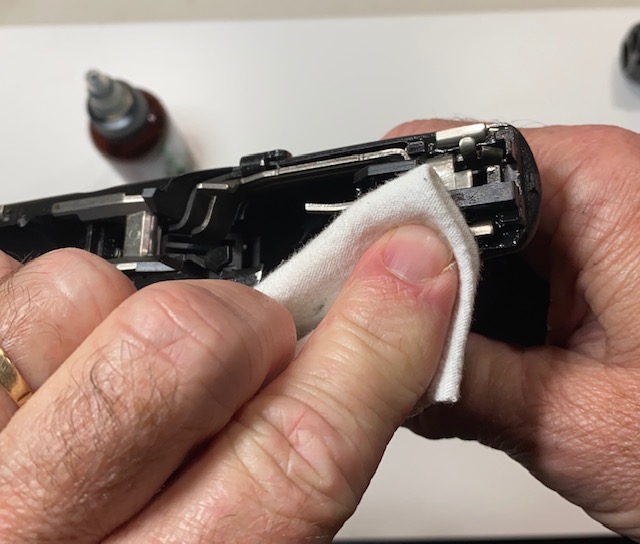
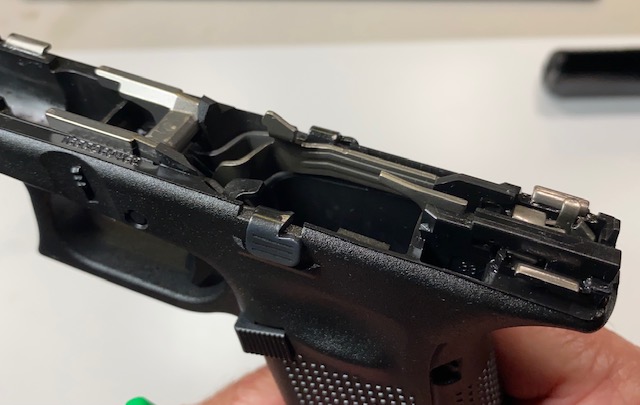
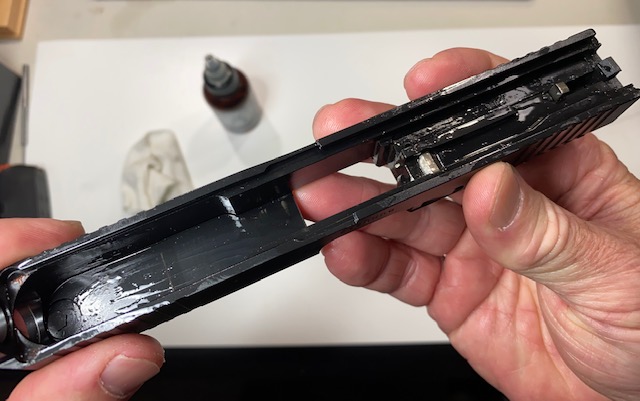
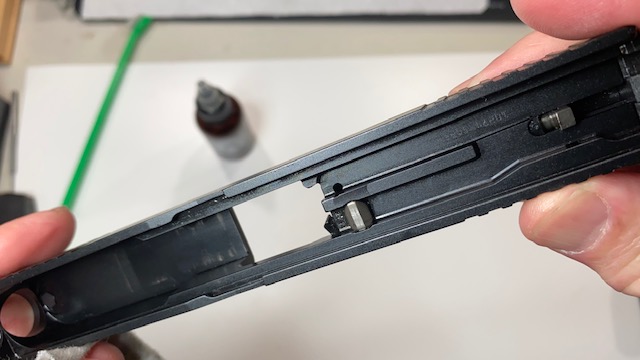
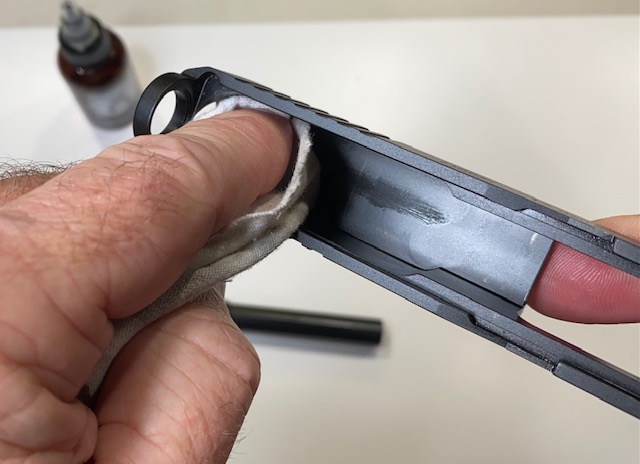
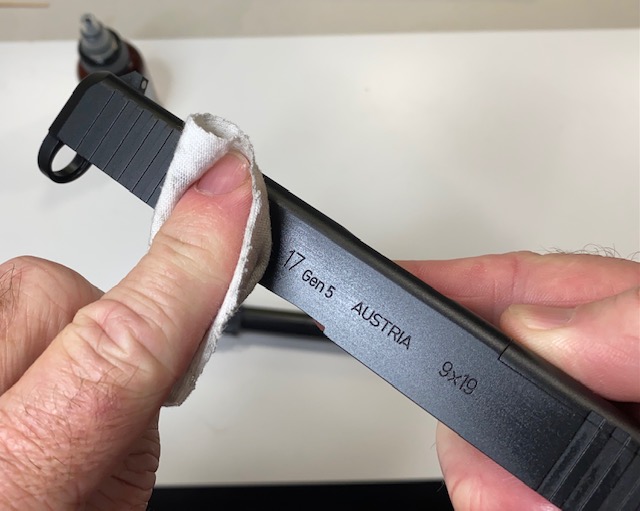
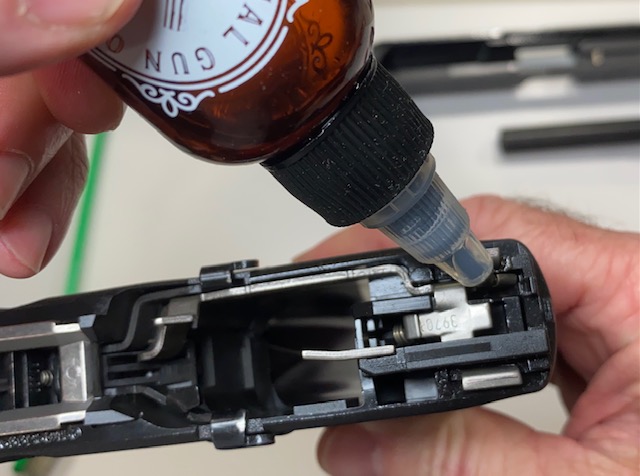
Step 2. Clean the Glock Frame
We volition now move on to clean the frame of the gun. Apply some cleaner to all the metal parts inside the frame. Use a fabric or brush to spread information technology around then all the dirty areas are coated with the cleaner.


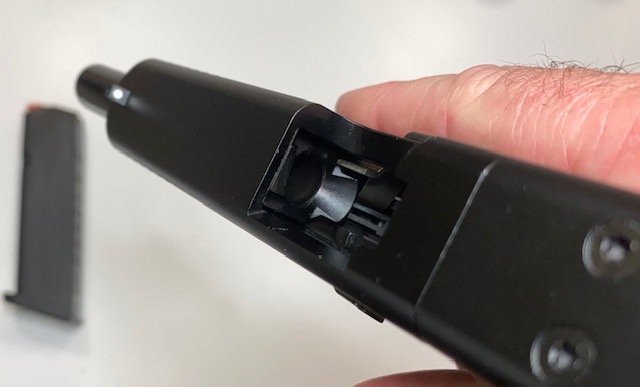
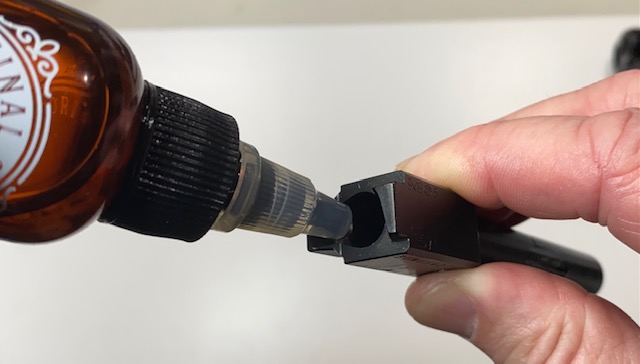
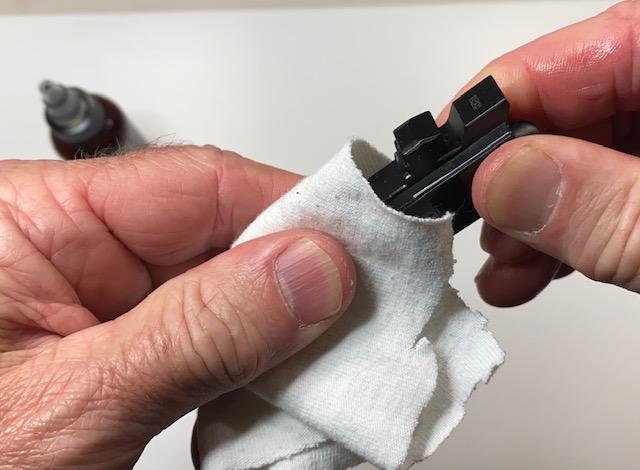
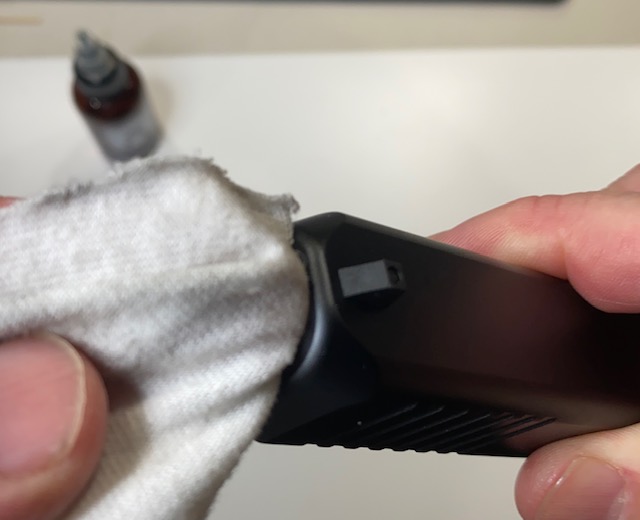
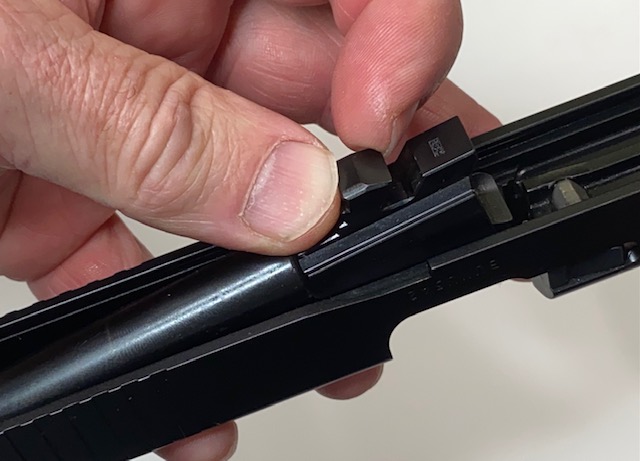
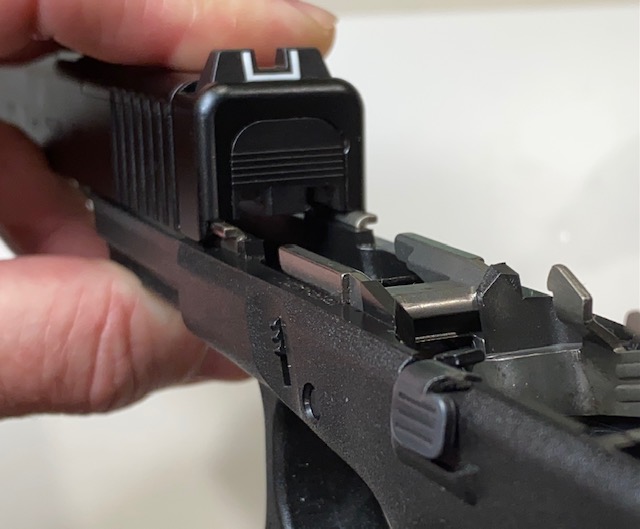
Step 3. Clean the Glock Slide
The slide is where virtually of the action happens and so we desire to spend some time cleaning this office.

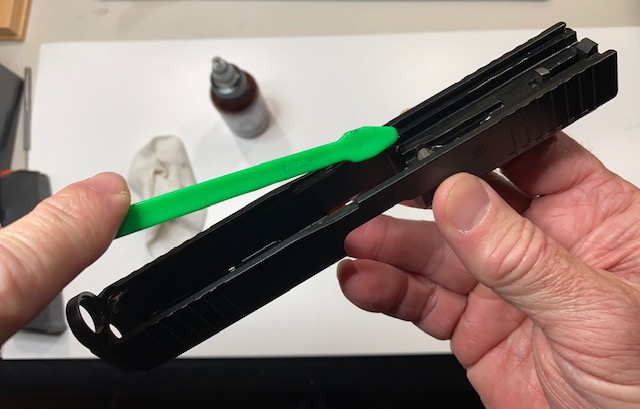
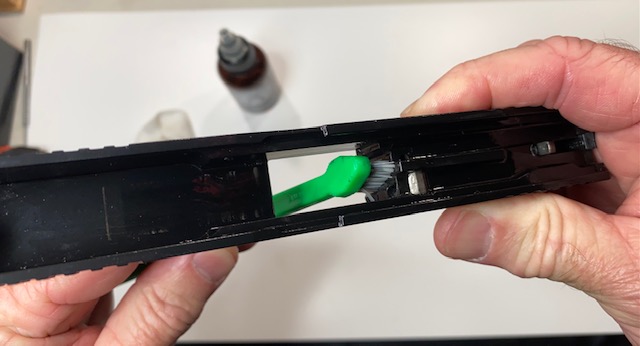
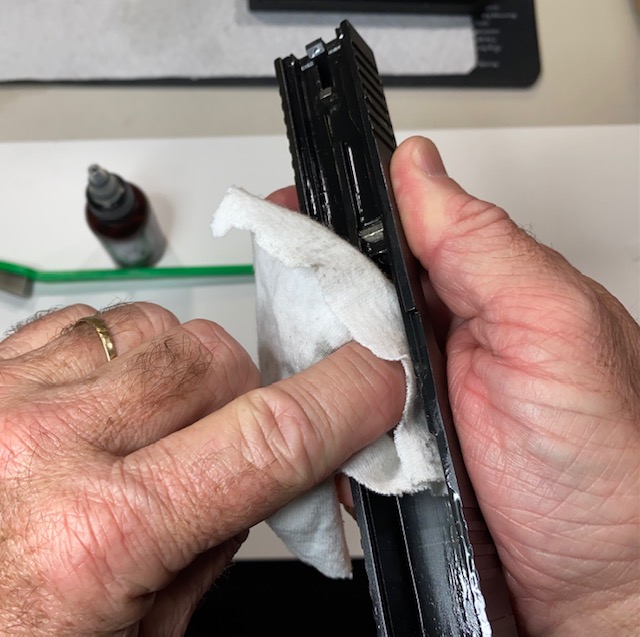
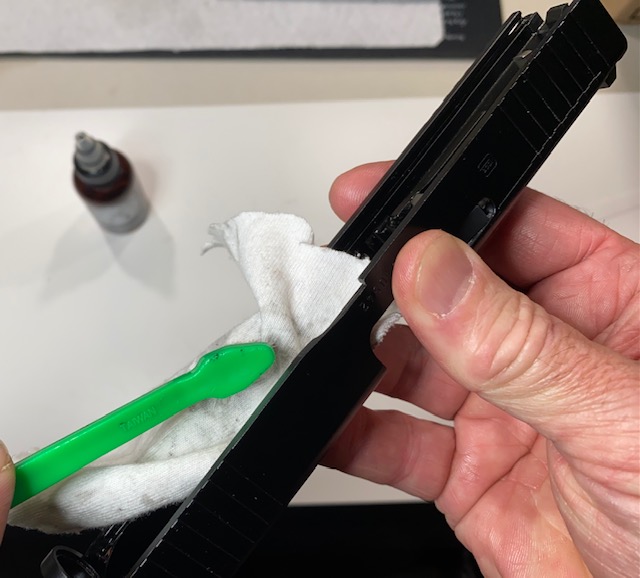
Since we are using a CLP product (Cleaner, Lubricant and Protectant) is is not necessary to remove 100% of the oil from every little nook and cranny. This is considering any residue left over volition also lubricate and protect the gun from rust and corrosion.
Footstep 4. Lubricate the Glock 17 or Glock xix 9mm Pistol
Once all the parts are make clean, we need to lubricate the moving parts as shown with Original Gun Oil or other quality gun lubricant. The steps below follow the Glock user transmission lubrication procedures.

User Level Inspection
At this point you should perform a User Level inspection of the gun earlier you reassemble. I will have an article for that in the next week or so. In the meantime in that location is a video beneath that contains these checks.
Reassembly of the Glock 17, Glock nineteen 9mm Pistol
This function is very unproblematic with the Glock pistols. Probably the easies of all guns I have reassembled.

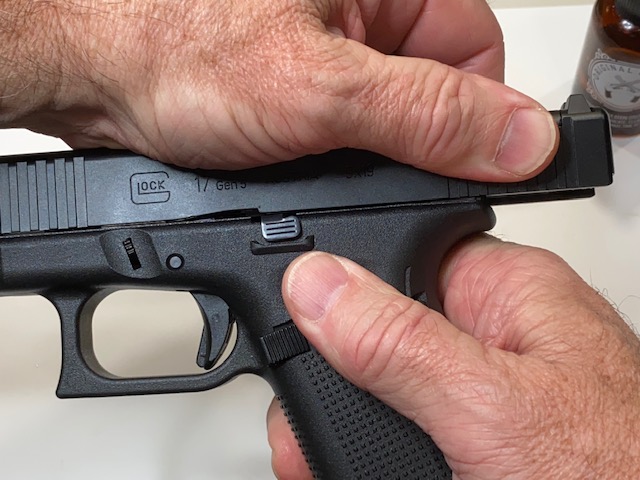
Last Steps to complete the reassembly of the Glock 17, Glock 19 or whatsoever other Glock pistol.
Work the slide dorsum and forth several times to be sure it operates properly, and to permit the lube to spread into all the areas that motility.
Perform the Glock User Level inspection earlier you burn the gun. These checks are integrated into the video below.
Video: How to Field Strip, Make clean, Lubricate and Reassemble a Glock 17 or Glock 19
Ok, you are all washed! That was a lot of steps but they are easy and you will wing through next fourth dimension!
Lastly, y'all should test the functionality of the gun past taking some dummy rounds and loading the gun with them. Now make certain a circular is ejected every time to rack the slide to the rear.
The gun is at present fully assembled and gear up for another twenty-four hours at the range!
Thanks for letting me walk y'all through the field strip, cleaning, lubrication and reassembly of your Glock 17 or Glock 19 (or any other Glock) pistol. Keeping your Glock clean and ready for use is an of import office of gun buying.
See article: How to Detach & Clean an AR-15 rifle
If you have any suggestions, recommendations or other comments, please leave it in the comment section below and I will ordinarily reply within 24 hours.

Source: https://kydexowbholsters.com/how-to-clean-a-glock-17-or-glock-19-9mm-pistol
Posted by: turnerandist.blogspot.com
0 Response to "How To Clean A Glock 22 40 Cal"
Post a Comment